Getting Started
Installation and quick start
Install StoryCraft, pick a template for your stories, and turn your first rough notes into a structured issue.
Installation
- 1
Find StoryCraft on the Atlassian Marketplace and click Try it free. StoryCraft works with Jira Cloud.
- 2
Grant the requested permissions. StoryCraft needs to read and write Jira issue data, and to store its settings in Atlassian's Forge storage.
- 3
Open any issue and expand the StoryCraft section in the right-hand column.
 Open StoryCraft on the Atlassian Marketplace ↗
Quick start
From a few lines of notes to a story in your team's template in five steps.
- 1
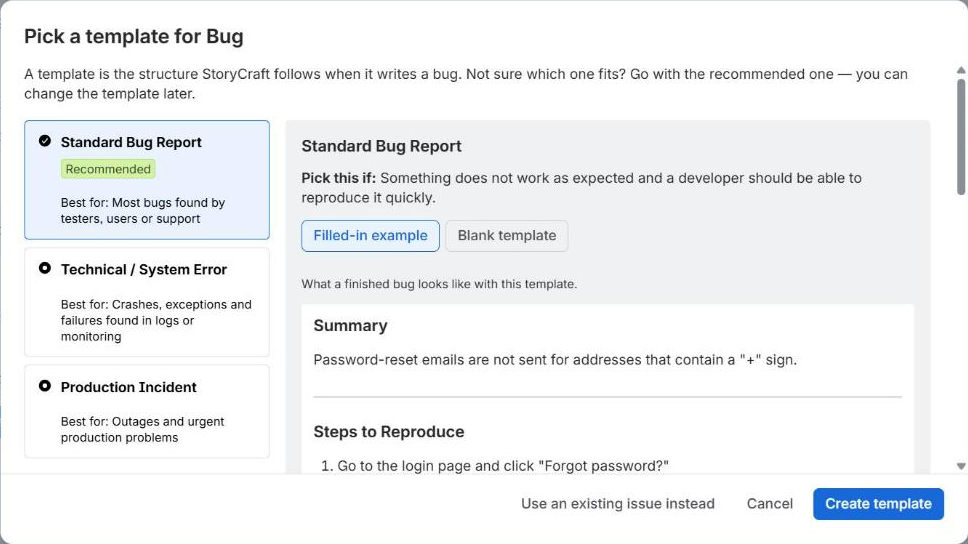
Pick a template. In the StoryCraft project settings, open the Settings tab, select Story and click Choose & Create Template. Not sure which one fits? Take the one marked Recommended. You can skip this step: without a template, StoryCraft uses a default structure.
- 2
Write rough notes. Open a story and save a few lines in its description, such as who needs what and why.
- 3
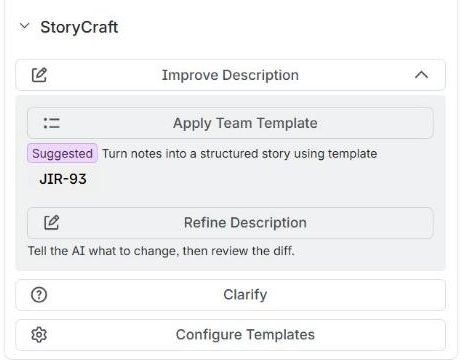
Apply the template. In the StoryCraft panel, click Improve Description, then Apply Team Template.
- 4
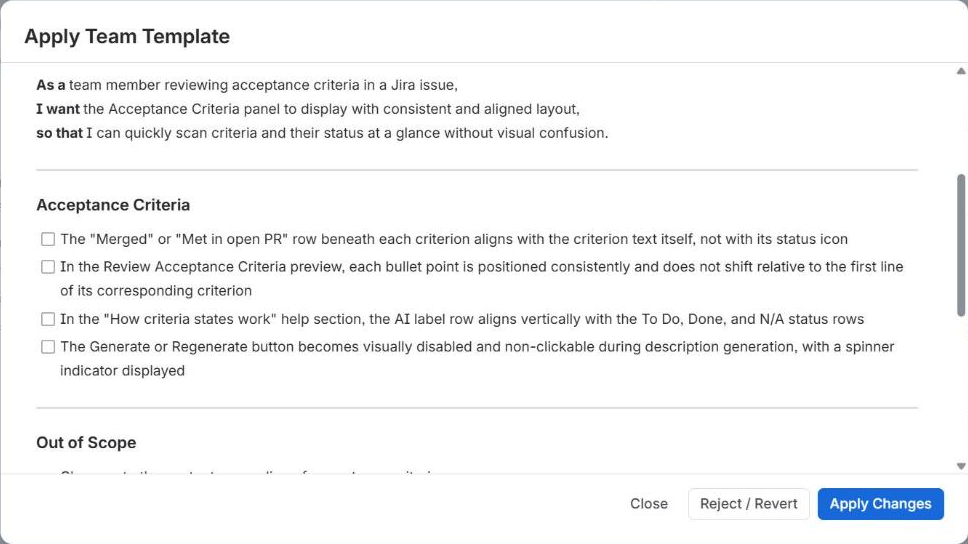
Review the result. Switch between Diff and Result, type an instruction under Refine further to adjust it, or click Edit text to change it yourself.
- 5
Click Apply Changes. The new description is saved to the issue. To start over instead, click Reject / Revert.
Project settings
Project administrators find StoryCraft under Project settings → Apps → StoryCraft (called Space settings in newer Jira), or by clicking Configure Templates in the issue panel. There are four tabs:
Settings
A template and an optional example issue for each issue type.
Project Context
Tell the AI about your domain, tech stack and team conventions.
Glossary
Your project's terms, suggested from recent issues, and the words to avoid.
Analytics
How often your team uses each StoryCraft feature over 7 or 30 days.